
March 23, 2022
Getting Started with Spring Security
In the previous article, we understood what spring security is.
In this article, we will create a Spring Boot project with Spring Web dependency, we will create some APIs and understand various concepts of Spring Security
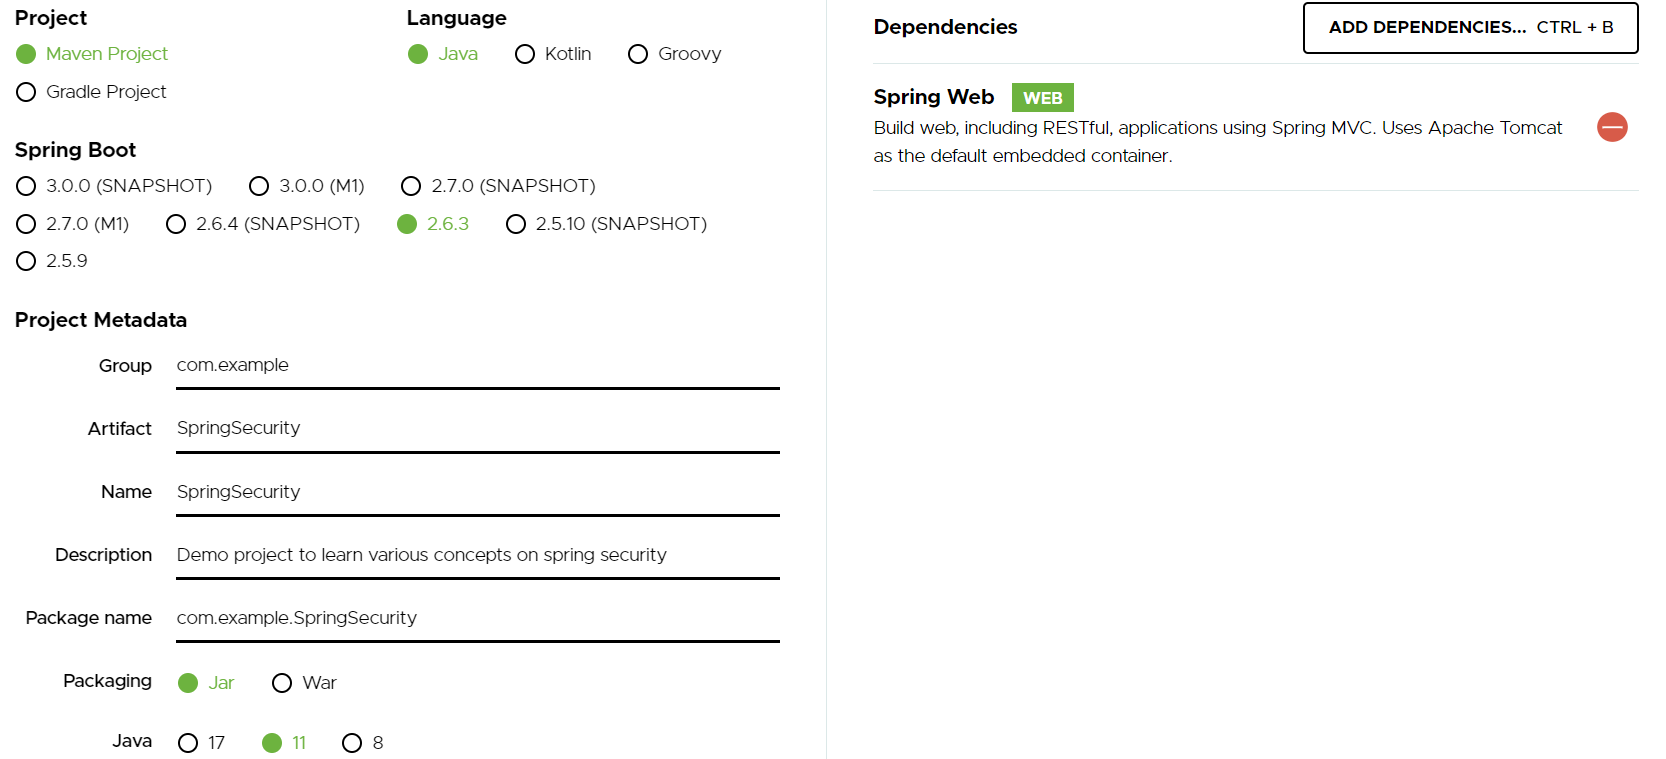
Create Spring Boot Application
Create an Employee class
package com.example.SpringSecurity.employee;

public class Employee {
    private Integer employeeId;
    private String employeeName;
    private String designation;

    public Employee(Integer employeeId, String employeeName, String designation) {
        this.employeeId = employeeId;
        this.employeeName = employeeName;
        this.designation = designation;
    }

    public Integer getEmployeeId() {
        return employeeId;
    }
    public void setEmployeeId(Integer employeeId) {
        this.employeeId = employeeId;
    }
    public String getEmployeeName() {
        return employeeName;
    }
    public void setEmployeeName(String employeeName) {
        this.employeeName = employeeName;
    }

    public String getDesignation() {
        return designation;
    }
    public void setDesignation(String designation) {
        this.designation = designation;
    }
}
Create an EmployeeController
Here we will have an endpoint with will get employee details as per the given 'id'
package com.example.SpringSecurity.employee;
import org.springframework.web.bind.annotation.GetMapping;
import org.springframework.web.bind.annotation.PathVariable;
import org.springframework.web.bind.annotation.RequestMapping;
import org.springframework.web.bind.annotation.RestController;

import java.util.Arrays;
import java.util.List;

@RestController
@RequestMapping("api/v1/employees")
public class EmployeeController {

    private static final List<Employee> EMPLOYEES = Arrays.asList(
      new Employee(1, "Alex James","Developer"),
      new Employee(2, "Oliver Jones","QA"),
      new Employee(3, "Robert Gayle","DBA")
    );

    @GetMapping(path = "{employeeId}")
    public Employee getStudent(@PathVariable("employeeId") Integer employeeId) {
        return EMPLOYEES.stream()
                .filter(employee -> employeeId.equals(employee.getEmployeeId()))
                .findFirst()
                .orElseThrow(() -> new IllegalStateException(
                        "Employee with Id- " + employeeId + " does not exists"
                ));
    }
}
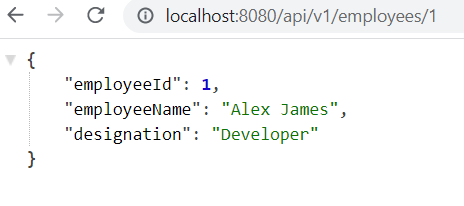
We have created a static List EMPLOYEES and a **GET **endpoint that returns the details of the employee with 'id' as the path variable.
Now if we start our application, as we have not implemented any security mechanism as of now we can access the API.
Now let's add Spring Security dependency in the pom.xml
<dependency>
		<groupId>org.springframework.boot</groupId>
		<artifactId>spring-boot-starter-security</artifactId>
</dependency>
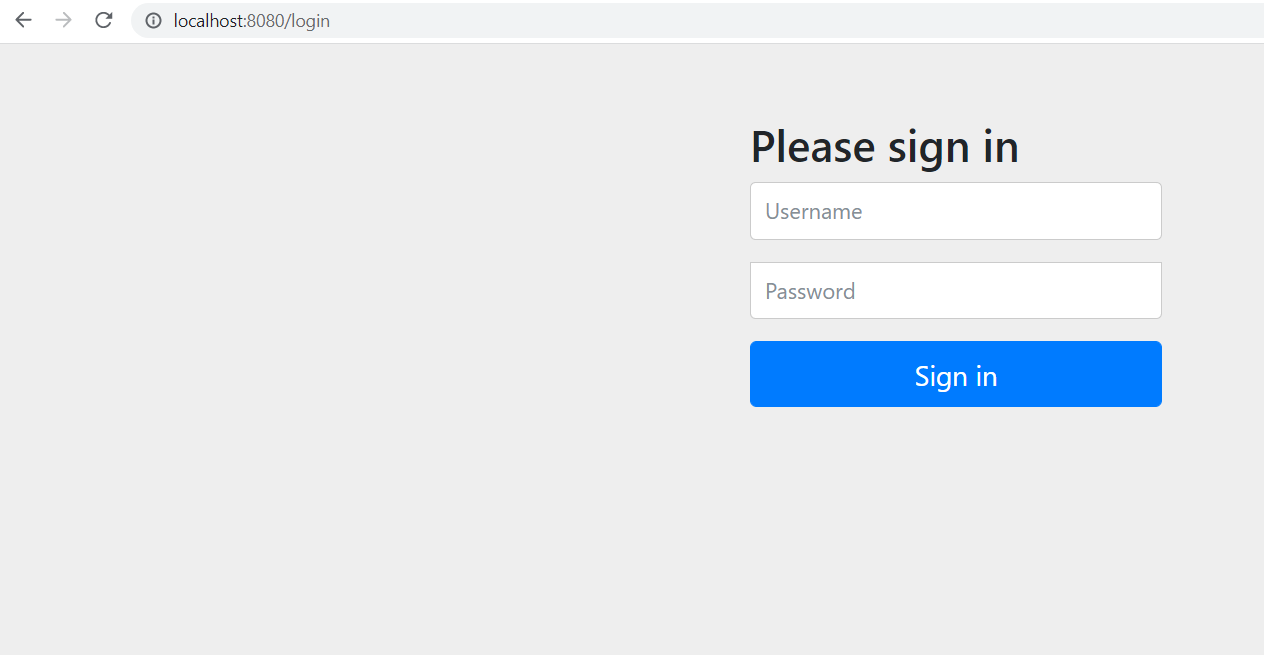
After adding this dependency, we restart the application and try to access the same API. We get a login page
So, just adding the dependency all our APIs are secured. Spring Security provides this feature out of the box.
So, how to log in?
- Default Username is user
- Password is generated in-memory you can find that in the logs.
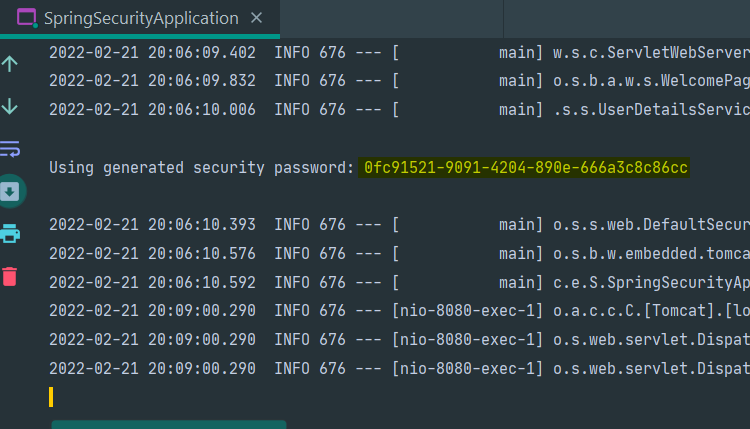
Whenever we restart the application, a new password is generated.
Till now we have seen, whenever we add spring security dependency and try to access any of the APIs we get redirected to the login page (http://localhost:8080/login) even though we have not created any login page. After successful login, we can access the APIs.
Let us understand the flow behind the process
Whenever we try to access API (http://localhost:8080/api/v1/employees/1), login page is loaded.
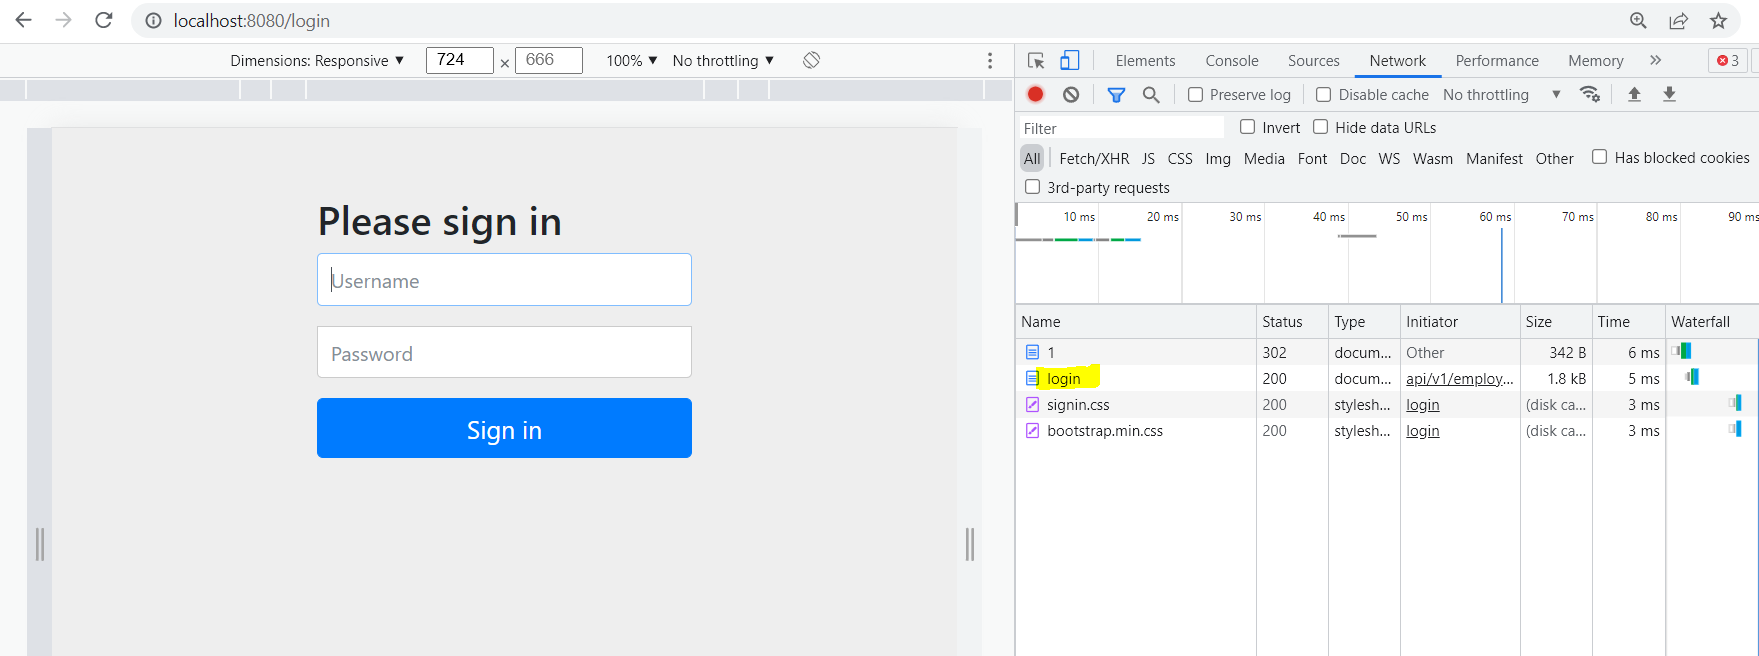
Add the username(user) and password(generated in logs) and click on Sign In
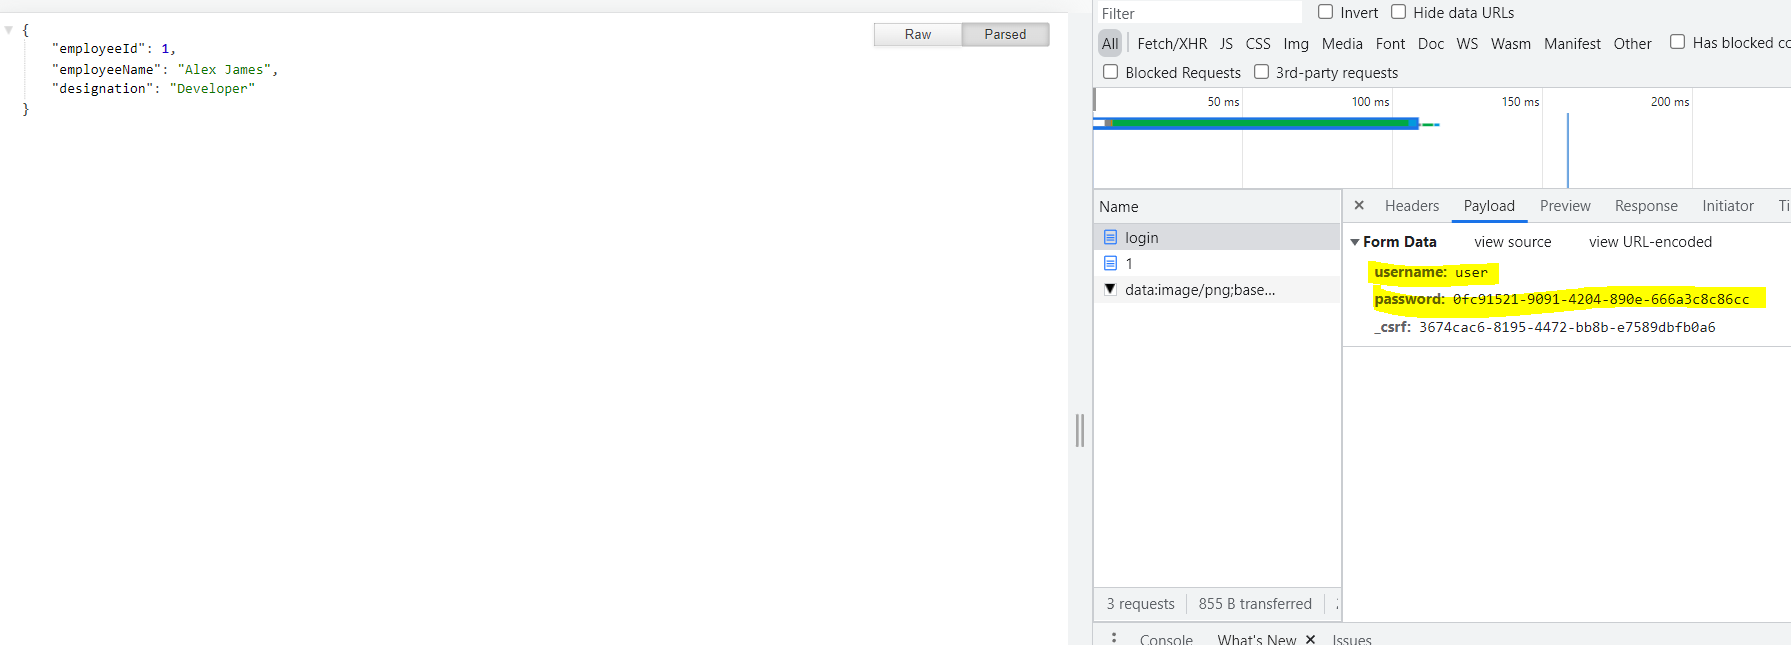
When we click on Sign In, username and password are sent as payload, and if SUCCESS we get the response.
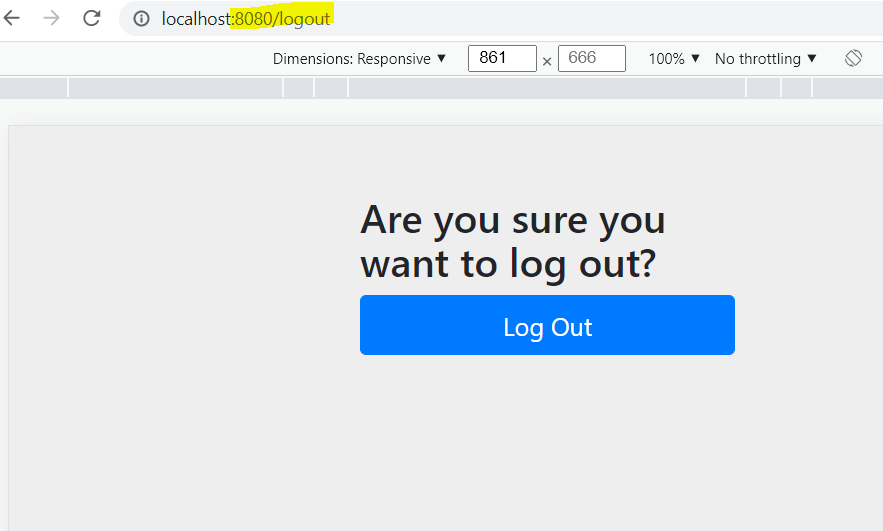
Like Login, we can also perform a logout (http://localhost:8080/logout).
So, this is what we called form-based login, where we can log in and logout from the application. We will go more deeply into Form-Based Login in further articles.
Conclusion
In this article, we created a simple Spring Boot project with an API. We then added Spring Security dependency and saw the magic of login and logout without any configuration. Also, we got introduced to form-based login.
In the next article, we will start with Basic auth, where we will understand how to create our own users. We will also understand, how can we whitelist some URLs from security and a lot more.
You can find the code here
That's it for this one.
If you have any feedback/suggestions, do mention them in the comments.
If you found this helpful, do give it a like 👍.
Thanks for Reading! Stay Tuned for the next one.
Till the Bye 👋